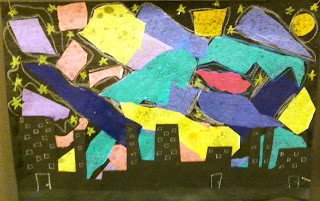
Project Summary:
This project started by choosing different types of tissue paper and cutting the tissue paper into shapes that we thought we would use in this project. Then we placed the shapes we had cut onto a black sheet of construction paper. Once we found a spot where we wanted to put that piece of tissue paper, we glued the paper down. After we had everything glued, we went over the entire project with glue adhessive to help the tissue paper stay in place. The next step was to create the bottom part of the project, the landscape. Most of us chose to do a town scence with buildings. We were then to paste our landscape down at the bottom of the project. After this was completed, we were to use oil pastels on the picture to add color and shapes to our picture. I added stars and outlined the tissue paper to give it more of a bolder look.
Activity:
This activity I didn't like as much as the rest of them. An activity you could do with this project is to talk about stars and how they relate to the night sky. You could go more in depth on stars depending on the grade level.
No comments:
Post a Comment